A Step-by-Step Guide on Connecting Wallet to Galxe and Switching Networks
Galxe is a decentralized blockchain platform that allows users to interact with various decentralized applications (DApps) and manage digital assets. In order to fully utilize the functionalities of Galxe, users need to connect their wallets and switch networks. This step-by-step guide will walk you through the process of connecting your wallet on Galxe and switching networks.
Step 1: Install a Wallet
The first step is to install a wallet that is compatible with Galxe. There are several wallet options available, including MetaMask, Trust Wallet, and MyEtherWallet. Choose the wallet that suits your preferences and install it on your device.
Step 2: Create a New Wallet or Import an Existing One
Once you have installed the wallet, you need to either create a new wallet or import an existing one. If you are creating a new wallet, make sure to securely store your mnemonic phrase or private key. If you are importing an existing wallet, you will need to enter your mnemonic phrase or private key to access your wallet.
Step 3: Connect your Wallet to Galxe
After setting up your wallet, you need to connect it to the Galxe platform. Open your wallet and navigate to the settings or options menu, where you will find the “Networks” or “Network Settings” tab. Click on this tab and select “Galxe” as the network.
Step 4: Switch Networks
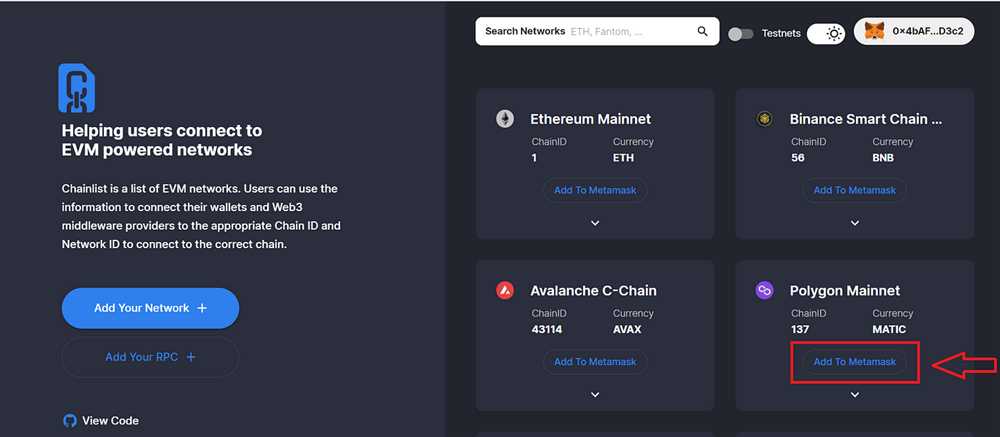
Now that your wallet is connected to Galxe, you can switch networks within the platform. To switch networks, go to the Galxe platform and select the “Networks” or “Network Settings” tab. From the dropdown menu, choose the network you want to switch to, such as Ethereum, Binance Smart Chain, or any other supported network.
Step 5: Confirm the Network Switch
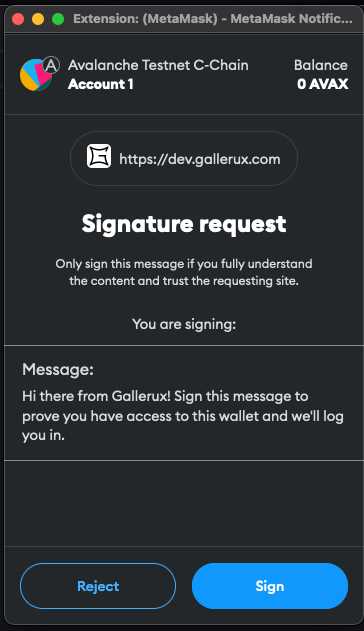
Once you have selected the desired network, your wallet will prompt you to confirm the network switch. Follow the instructions provided by your wallet to confirm the switch. This may involve signing a message or entering your wallet password.
By following these steps, you can easily connect your wallet on Galxe and switch networks. This will allow you to explore and engage with the various DApps and services available on Galxe, all while securely managing your digital assets. Start your Galxe journey today and unlock the full potential of decentralized finance!
How to Connect Wallet on Galxe and Switch Network
Connecting your wallet on Galxe is a simple and straightforward process. Follow the step-by-step guide below to connect your wallet and switch networks seamlessly.
1. Open the Galxe platform on your preferred web browser.
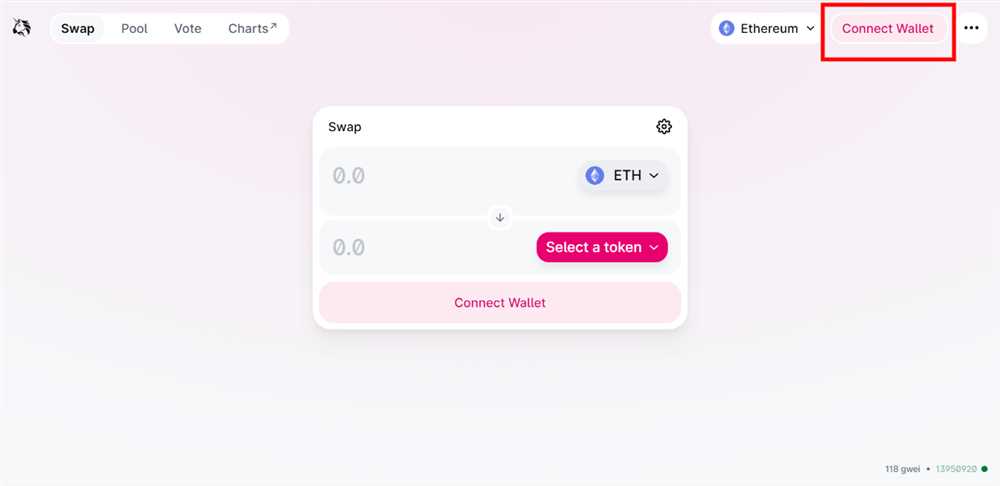
2. Look for the wallet icon on the top right corner of the screen and click on it.
3. A dropdown menu will appear with different wallet options. Choose the wallet you want to connect with Galxe.
4. If you don’t have a wallet yet, you can create one by clicking on the “create new wallet” button. Follow the instructions to set up your wallet.
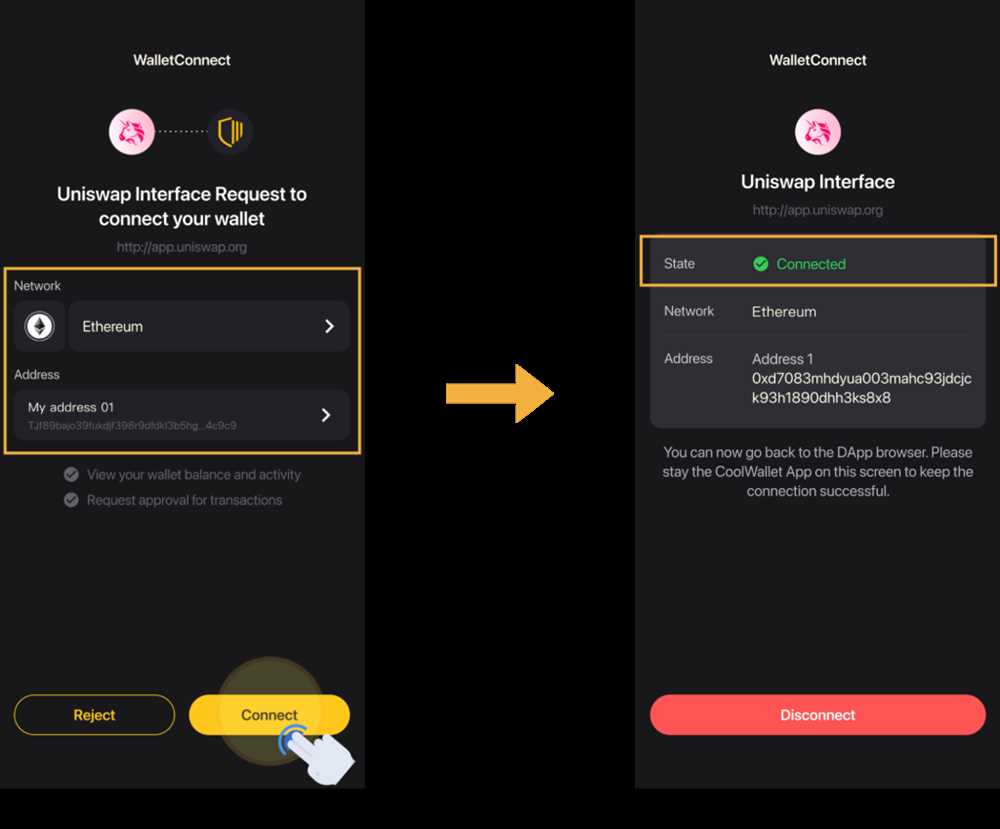
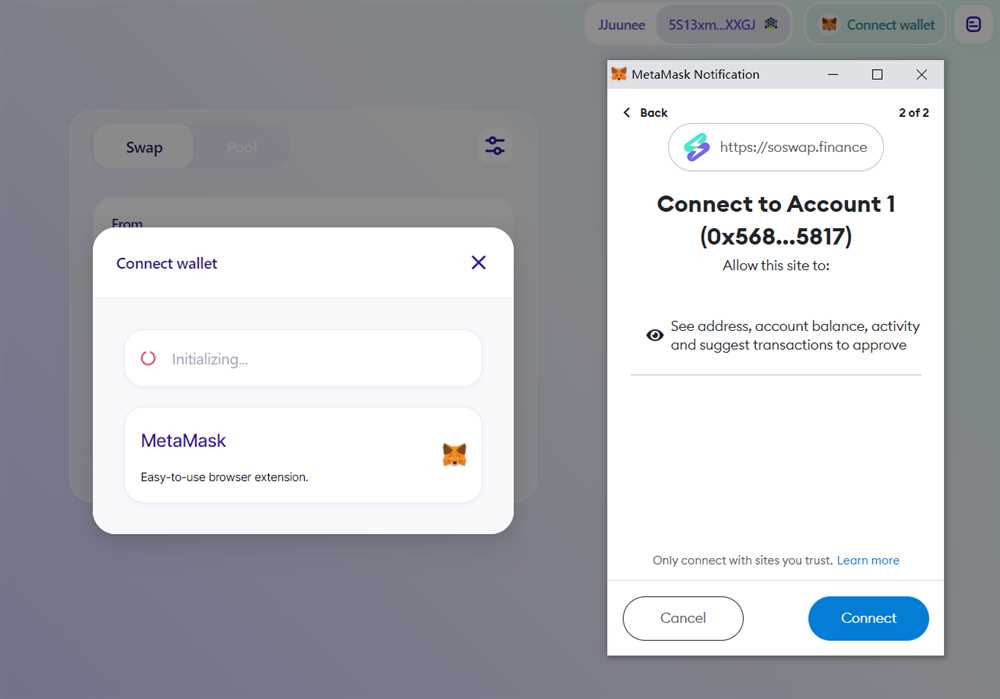
5. Once you have selected or created your wallet, you will be redirected to a new screen where you need to authorize the wallet connection.
6. Depending on the wallet you choose, you will need to follow the specific instructions provided by the wallet provider to authorize the connection.
7. After authorizing the connection, your wallet will be successfully connected to Galxe.
Now, let’s move on to switching networks on Galxe:
1. Once your wallet is connected, locate the network icon on the top right corner of the screen and click on it.
2. A dropdown menu will appear with different network options. Choose the network you want to switch to.
3. After selecting the desired network, your wallet will be switched to that network.
4. You can now use Galxe on the new network and access its various features and functionalities.
Switching networks on Galxe allows you to explore different ecosystems and participate in various blockchain activities.
Remember to always double-check the network you are connected to and only authorize wallet connections from trusted sources.
Enjoy seamless connectivity and network switching on Galxe!
A Step-by-Step Guide
Connecting your wallet to Galxe and switching networks is a simple process that can be done in a few easy steps. Follow the guide below to get started:
Step 1: Download the Galxe Wallet
The first step is to download and install the Galxe Wallet app on your device. You can find the app on the Galxe website or in your device’s app store.
Step 2: Create a Wallet
Once the app is installed, open it and follow the prompts to create a new wallet. Make sure to record your wallet’s recovery phrase and keep it in a safe place.
Step 3: Connect your Wallet
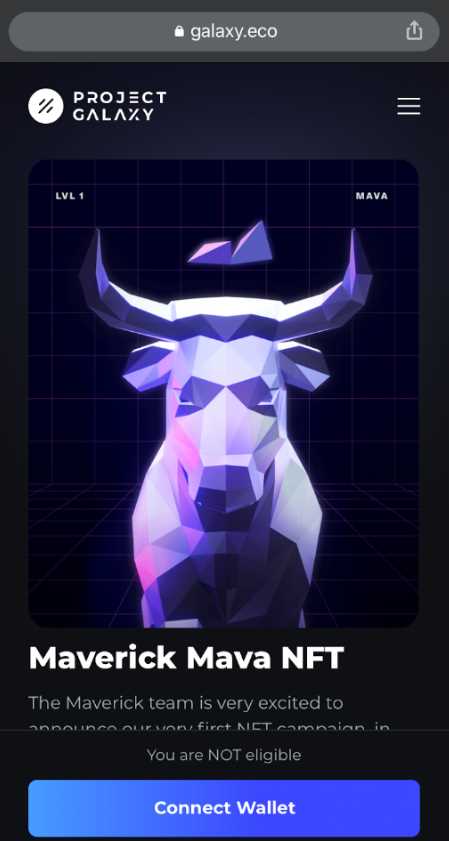
After creating your wallet, you will need to connect it to the Galxe platform. To do this, open the Galxe website in your browser and click on the “Connect Wallet” button.
Note: Make sure that your wallet is unlocked and connected to your device before proceeding to the next step.
Step 4: Switch Networks
Once your wallet is connected, you can switch between different networks within the Galxe platform. To switch to a different network, click on the network icon in the wallet interface and select the desired network from the dropdown menu.
Note: Each network may have its own requirements and settings, so make sure to familiarize yourself with the specific network you wish to connect to.
By following these simple steps, you can easily connect your wallet to Galxe and switch networks. Enjoy exploring the different opportunities and functionalities offered by Galxe!
Creating a Galxe Wallet
In order to connect your wallet on Galxe and switch networks, you will first need to create a Galxe wallet. Follow these steps to create your wallet:
Step 1: Download Galxe Wallet
The first step is to download the Galxe Wallet app from the official website. Make sure to download the version that is compatible with your device’s operating system.
Step 2: Install the Galxe Wallet
Once the app is downloaded, install it on your device by following the installation instructions specific to your operating system.
Step 3: Set Up Your Wallet
Open the Galxe Wallet app and select the option to create a new wallet. You will be prompted to set up a password for your wallet. Make sure to choose a strong, unique password to secure your wallet.
Step 4: Write Down Your Backup Phrase
After setting up your password, you will be given a backup phrase. This backup phrase is important as it can be used to restore your wallet if you ever lose access to your device or forget your password. Write down the backup phrase and store it in a secure location.
Step 5: Confirm Your Backup Phrase
To ensure that you have correctly written down your backup phrase, the Galxe Wallet app will ask you to confirm it by selecting the correct words in the correct order. This step is crucial for security purposes.
Step 6: Your Wallet is Created
Once you have confirmed your backup phrase, your Galxe wallet is successfully created. You can now use your wallet to connect to Galxe and switch networks as needed.
It is important to note that creating a Galxe wallet requires careful attention to security measures. Make sure to keep your password and backup phrase safe and secure. Additionally, be cautious of any suspicious links or websites claiming to be the official Galxe Wallet. Always download the wallet from the official website to avoid potential scams or security risks.
Connecting Your Galxe Wallet
Step 1: Open the Galxe application on your device.
Step 2: Once the application is launched, click on the “Settings” option, usually located on the home screen or in the navigation menu.
Step 3: In the settings menu, select “Wallet” or “Connect Wallet” to initiate the connection process.
Step 4: Choose the type of wallet you want to connect. Galxe supports a variety of wallets, including MetaMask, Trust Wallet, and Coinbase Wallet.
Step 5: Follow the on-screen instructions to connect your chosen wallet. This may involve entering your wallet passphrase or providing permission to access your wallet data.
Step 6: Once your wallet is successfully connected, you may need to switch to the desired network. Galxe supports multiple networks, such as Ethereum and Binance Smart Chain.
Step 7: To switch the network, go back to the settings menu and find the “Network” or “Switch Network” option. Select the desired network from the available options.
Step 8: Confirm the network switch and wait for the change to take effect. This may require some time for the wallet to synchronize with the new network.
Step 9: Congratulations! Your Galxe wallet is now connected and configured to the desired network. You can now start using your wallet to interact with decentralized applications (dApps) and manage your digital assets.
Note: It is essential to ensure the security of your wallet and exercise caution while making transactions or interacting with dApps. Always double-check the addresses and contracts you are working with to avoid any potential scams or phishing attempts.
Switching Networks on Galxe
Switching networks on Galxe allows you to connect to different blockchain networks and access various decentralized applications. Here is a step-by-step guide on how to switch networks on Galxe:
Step 1: Open Galxe Wallet
To start, open the Galxe wallet on your device. Make sure you are connected to the internet.
Step 2: Access Settings
In the Galxe wallet, locate the “Settings” section. It is usually represented by a gear or cogwheel icon. Click on it to access the settings.
Step 3: Select Network
In the settings, you will see a dropdown menu where you can select the network you want to switch to. Galxe supports multiple networks such as Ethereum, Binance Smart Chain, and more.
Step 4: Connect Wallet
Once you have selected the desired network, you will need to connect your wallet to that network. This typically involves authorizing the connection and signing a transaction.
Step 5: Confirm Connection
After connecting your wallet to the new network, the Galxe wallet will display a confirmation message indicating that you are now connected to the selected network.
Step 6: Explore DApps
Now that you have switched networks on Galxe, you can start exploring decentralized applications (DApps) specific to that network. You can interact with smart contracts, trade cryptocurrencies, or participate in other blockchain activities.
Remember that different networks may have their own unique features, tokens, and functionalities. It’s important to be aware of the network you are using and take necessary precautions when transacting.
| Network | Chain ID |
|---|---|
| Ethereum Mainnet | 1 |
| Ropsten Testnet | 3 |
| Binance Smart Chain | 56 |
Make sure to double-check the network details before performing any transactions to avoid any loss of funds or unauthorized activities. Happy exploring!
Troubleshooting Wallet Connection
If you are experiencing difficulties connecting your wallet to Galxe or switching networks, here are some troubleshooting steps you can follow:
1. Check your Internet connection:
Ensure that you have a stable internet connection. If your connection is weak or intermittent, it may cause issues with wallet connectivity. Try switching to a different network or restarting your router.
2. Update your wallet software:
Make sure you are using the latest version of your wallet software. Developers frequently release updates to fix bugs and improve compatibility with different networks. Check the official website or the app store to see if there are any updates available.
3. Double-check your wallet address:
Verify that you have entered the correct wallet address. Typos or errors in the address can prevent proper connection to Galxe or other networks. Cross-reference the address with the one provided by the wallet provider or double-check if you copied it correctly.
4. Clear cache and cookies:
In some cases, cache and cookies stored in your browser can interfere with wallet connectivity. Clearing them can resolve any conflicts. Go to your browser settings, locate the cache and cookies options, and clear them. Restart your browser and try connecting the wallet again.
5. Disable browser extensions:
Browser extensions can sometimes conflict with wallet connections. Disable any extensions that might interfere with the wallet’s functionality. You can re-enable them once the connection is established.
6. Contact wallet support:
If you have followed all the steps above and are still unable to connect your wallet, reach out to the wallet support team for further assistance. They can provide specific troubleshooting steps or offer guidance on resolving the issue.
By following these troubleshooting steps, you should be able to diagnose and resolve most issues that arise when trying to connect your wallet on Galxe or switch networks.
What is Galxe Wallet?
Galxe Wallet is a digital wallet that allows users to securely store, manage, and transact with their cryptocurrencies. It supports multiple blockchain networks and provides a user-friendly interface for easy navigation.
How can I connect my wallet to Galxe?
To connect your wallet to Galxe, you need to open the Galxe application and click on the “Connect Wallet” button. Then, select your preferred wallet and follow the on-screen instructions to complete the connection process.
Can I switch networks on Galxe Wallet?
Yes, you can switch networks on Galxe Wallet. To do this, you need to open the Galxe application, click on the “Network” tab, and select the desired network from the available options. Once selected, your wallet will be connected to the chosen network.