Connecting and Setting Up a Wallet on Galxe
Welcome to Galxe, a revolutionary platform that allows you to securely store and manage your cryptocurrency. In this step-by-step guide, we will walk you through the process of connecting and setting up a wallet on Galxe to ensure your funds are safe and accessible.
Step 1: Accessing Galxe
To get started, visit the Galxe website and create an account. After successfully registering, log in to your account using your credentials. You will be taken to your dashboard, where you can begin the process of connecting a wallet.
Step 2: Connecting a Wallet
Click on the “Connect Wallet” button, which will prompt a list of compatible wallets to choose from. Select your desired wallet from the options available and proceed with the connection process. Galxe supports a wide range of popular wallets, ensuring flexibility and convenience for all users.
Step 3: Setting Up your Wallet
Once your wallet is connected, Galxe will guide you through the process of setting it up. This will involve verifying your identity and creating a secure PIN or password to protect your funds. Make sure to use a strong and unique password that you can remember easily.
Step 4: Adding Funds to your Wallet
After your wallet is set up, you can start adding funds to it. Galxe supports a variety of cryptocurrencies, so you can choose the one that suits your needs. Simply select the cryptocurrency you want to add, enter the desired amount, and follow the instructions to complete the transaction.
Step 5: Managing your Wallet
With your wallet fully set up and funds added, you can now manage and monitor your cryptocurrency holdings. Galxe provides a user-friendly interface where you can track your transactions, view your balance, and make quick and secure transfers.
Congratulations! You have successfully connected and set up a wallet on Galxe. Now you can enjoy the benefits of a secure and convenient platform to store and manage your cryptocurrency. Remember to keep your password and recovery phrase safe, and always stay vigilant when it comes to online security.
How to Get Started
To get started with Galxe and set up your wallet, follow these steps:
- Download the Galxe Wallet App: Visit the Galxe official website and download the wallet app compatible with your operating system (Windows, macOS, or Linux).
- Install the Wallet App: Once the download is complete, open the installer file and follow the on-screen instructions to install the Galxe wallet app on your device.
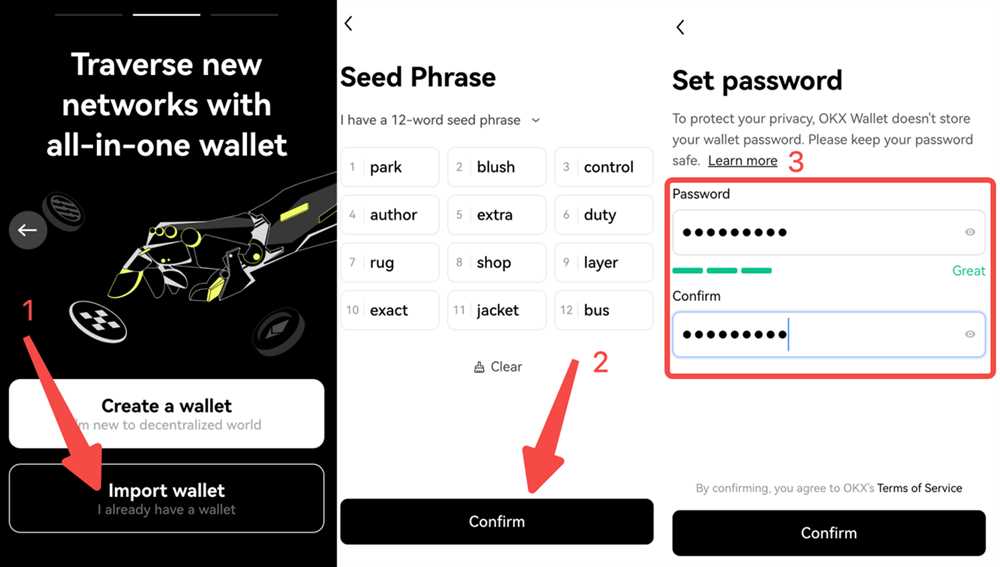
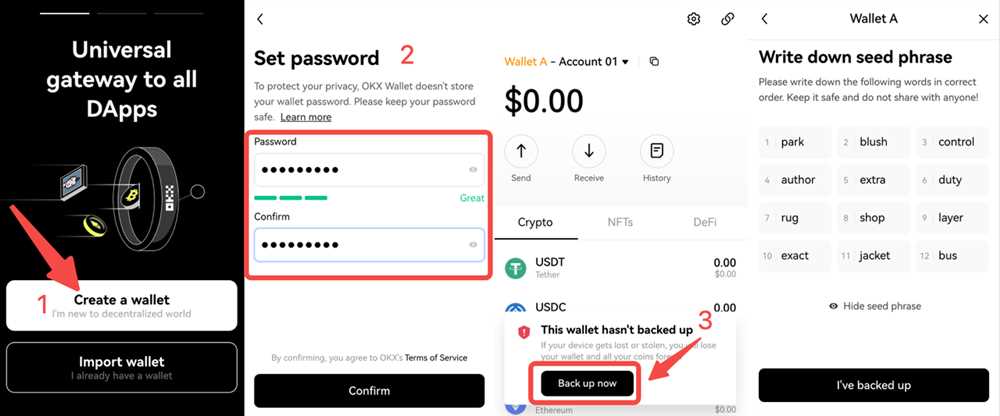
- Create a New Wallet: After the installation, launch the wallet app and click on the “Create New Wallet” button. Follow the prompts to set up a new wallet by choosing a strong password and securely storing your recovery phrase.
- Connect to the Galxe Network: Once your wallet is created, you will need to connect it to the Galxe network. Click on the “Connect” button or look for the “Connect” option in the wallet app’s settings menu.
- Fund Your Wallet: To start using your wallet, you’ll need to fund it with some Galxe coins. You can purchase Galxe coins from exchanges or receive them from someone else.
- Start Using Galxe: With your wallet connected and funded, you can now start using Galxe. Explore its features, send and receive coins, interact with decentralized applications (dApps), and participate in the Galxe ecosystem.
Remember to always keep your wallet password and recovery phrase safe and secure. Losing this information may result in permanent loss of access to your Galxe funds.
Note: This guide assumes basic familiarity with cryptocurrency wallets. If you’re new to cryptocurrency, it’s recommended to educate yourself about wallet security and best practices before getting started.
Creating an Account on Galxe
To create an account on Galxe, follow these step-by-step instructions:
| Step 1: | Visit the Galxe website at www.galxe.com. |
| Note: Make sure you are on the official Galxe website to avoid phishing attempts. | |
| Step 2: | Click on the “Sign Up” button located on the homepage. |
| Step 3: | Fill out the registration form with the required information, including your email address, password, and any additional details requested. |
| Note: Make sure to choose a strong password to ensure the security of your account. | |
| Step 4: | Read and accept the terms and conditions of Galxe. |
| Step 5: | Click on the “Create Account” button to complete the registration process. |
| Step 6: | You will receive a verification email from Galxe. Open the email and click on the verification link to activate your account. |
| Note: If you don’t receive the verification email, check your spam folder. | |
| Step 7: | Once your account is verified, you can log in to Galxe using your email address and password. |
Following these steps will allow you to successfully create an account on Galxe and start using their wallet services.
Choosing a Wallet Option
When it comes to setting up a wallet on Galxe, you have two options to choose from: web-based wallet or a hardware wallet.
A web-based wallet is a wallet that you can access through a web browser. This type of wallet offers convenience as you can access your funds from any device with an internet connection. However, it is important to keep in mind that web-based wallets may be more vulnerable to hacking and online attacks.
On the other hand, a hardware wallet is a physical device that stores your private keys offline. This provides a higher level of security as your private keys are not exposed to the internet. Hardware wallets are considered one of the safest options for storing your cryptocurrencies, but they may be less convenient to access compared to web-based wallets.
When choosing a wallet option, it is important to consider your level of comfort with technology, your security needs, and your usage patterns. If you are new to cryptocurrency and prefer a user-friendly option, a web-based wallet may be a good choice. If security is your top priority and you are willing to invest in a hardware device, a hardware wallet may be the better option.
Ultimately, the choice between a web-based wallet and a hardware wallet depends on your personal preferences and needs. Whatever option you choose, make sure to research and choose a reliable wallet provider to ensure the safety of your funds.
Connecting Your Wallet
To start using Galxe, you will need to connect your wallet to the platform. Here are the steps to follow:
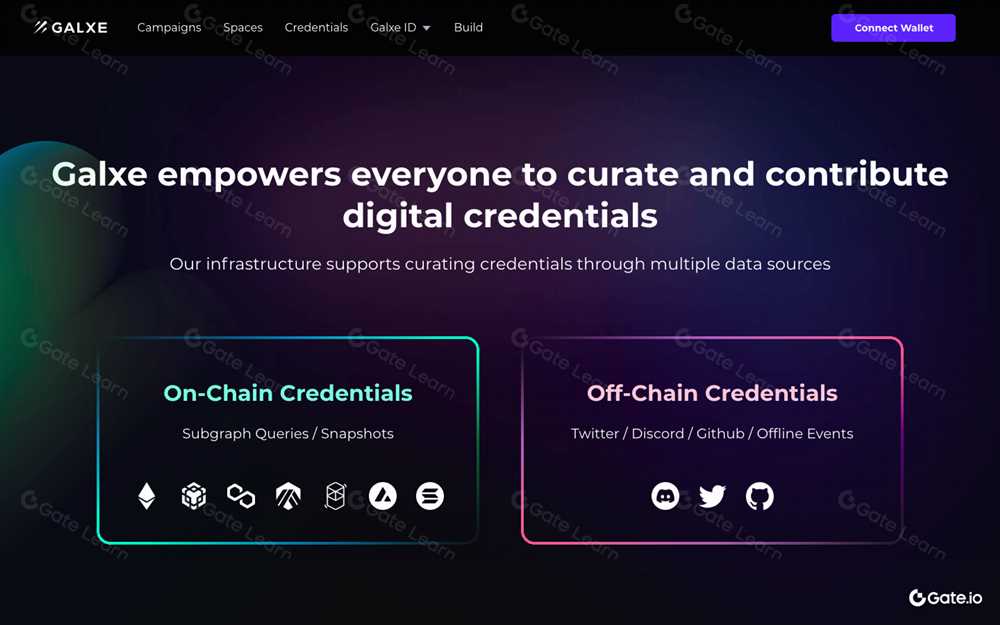
Step 1: Access Galxe Website
Open your preferred web browser and navigate to the Galxe website.
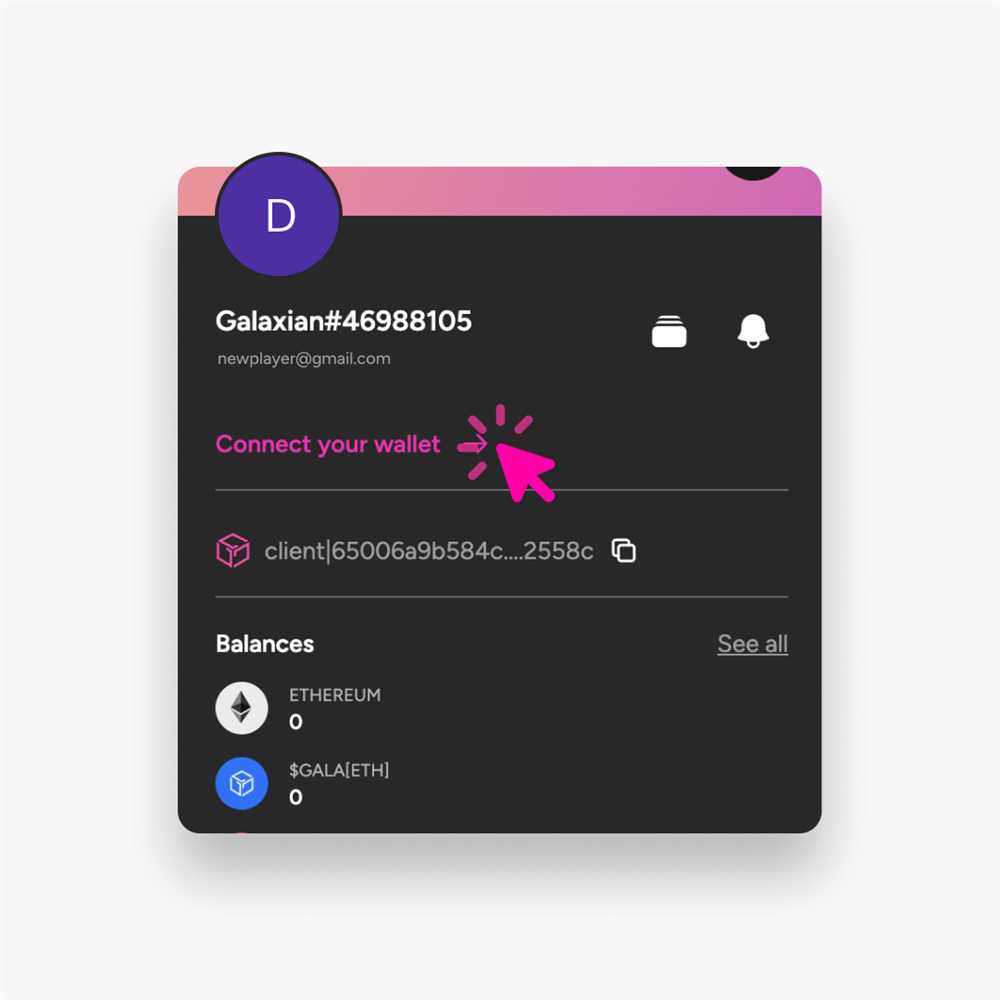
Step 2: Click on “Connect Wallet”
Once you are on the Galxe website, look for the “Connect Wallet” button. It is usually located at the top right corner of the page. Click on it to proceed.
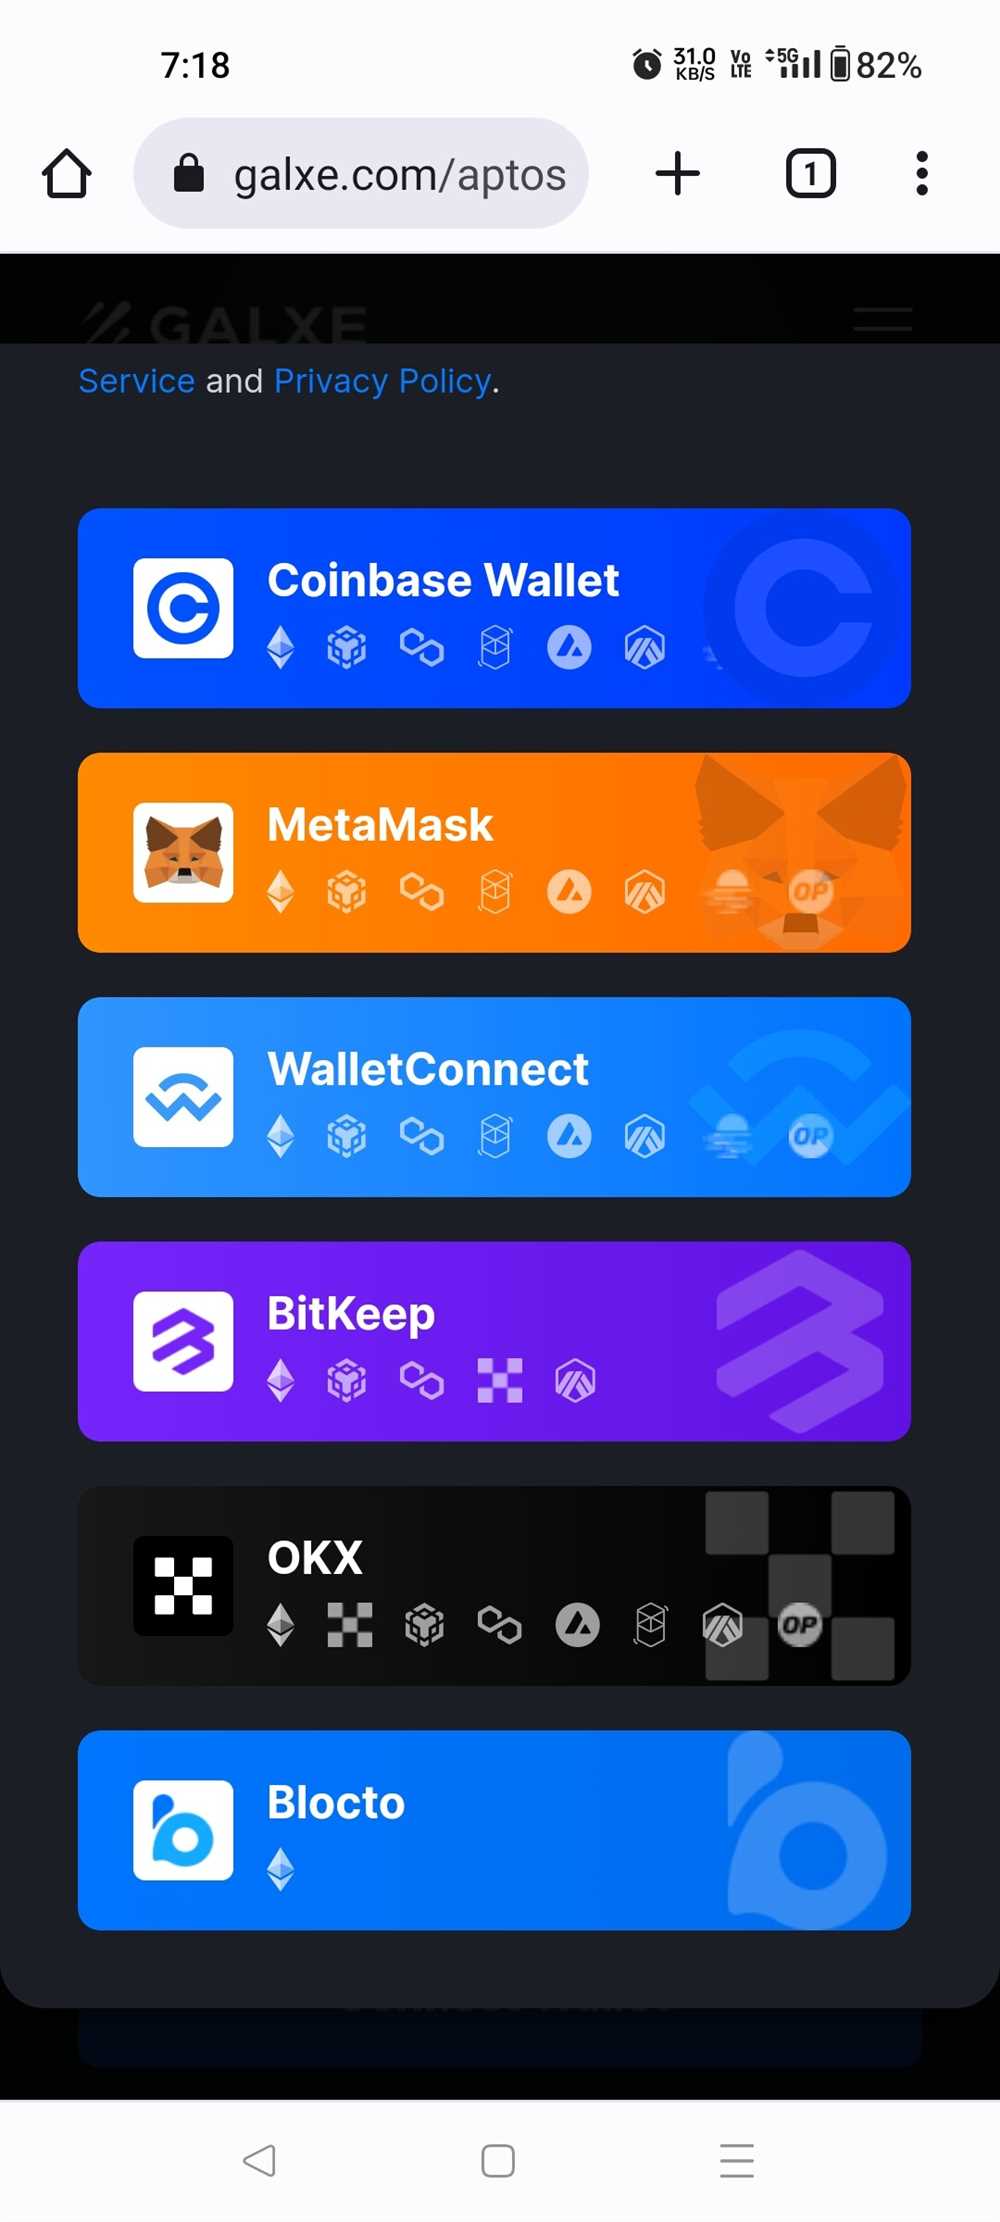
Step 3: Choose Your Wallet

A list of compatible wallets will appear on the screen. Choose the wallet you want to connect to Galxe by clicking on its icon.
Note: Make sure you have the selected wallet installed and set up on your device.
Step 4: Approve Connection
After selecting your wallet, a pop-up window will appear to authorize the connection. Follow the instructions provided by your wallet to approve the connection to Galxe.
Make sure to review the permissions requested by Galxe before granting access to your wallet.
Once you have approved the connection, you will be redirected to Galxe with your wallet successfully connected.
Now you are ready to explore the features and functionalities of Galxe using your connected wallet. You can manage your assets, trade cryptocurrencies, and participate in various activities offered by the platform.
Remember to keep your wallet secure and follow best practices for storing and handling your crypto assets.
Note: It is important to use only trusted wallets and ensure that you are visiting the official Galxe website to protect your funds and personal information.
Connecting MetaMask to Galxe
In order to connect your MetaMask wallet to Galxe, follow the steps below:
Step 1: Open the MetaMask extension in your browser.
Step 2: Ensure that you are on the Mainnet network in your MetaMask wallet.
Step 3: Click on the account icon in the top right corner of the MetaMask extension and select “Copy Address” to copy your wallet address.
Step 4: Go to the Galxe website and click on the “Connect Wallet” button.
Step 5: Select “MetaMask” as the wallet provider.
Step 6: Paste your wallet address into the provided field on the Galxe website and click “Connect”.
Step 7: Confirm the connection in the MetaMask extension by clicking “Connect” when prompted.
Step 8: Your MetaMask wallet is now connected to Galxe! You can now start using your wallet to interact with Galxe’s features and services.
Note: Make sure that you have sufficient funds in your MetaMask wallet to perform transactions on Galxe.
Connecting Ledger Nano S to Galxe
To connect your Ledger Nano S to Galxe, follow these simple steps:
Step 1: Install the Latest Version of Ledger Live App

Make sure you have the latest version of the Ledger Live app installed on your computer. You can download it from the official Ledger website.
Step 2: Update Firmware on Ledger Nano S
Connect your Ledger Nano S device to your computer using the USB cable provided. Open the Ledger Live app and navigate to the Manager section. If there is a firmware update available for your device, follow the on-screen instructions to update it.
Step 3: Enable Developer Mode
Once the firmware update is complete, disconnect your Ledger Nano S from the computer and reconnect it while holding down the left button. This will enable developer mode on your device.
Step 4: Open Galxe on Your Computer
Open the Galxe app on your computer and navigate to the “Settings” section.
Step 5: Connect Ledger Nano S
Connect your Ledger Nano S device to your computer using the USB cable. Select “Ledger Nano S” as your wallet option in the Galxe app.
Step 6: Confirm Connection on Ledger Nano S
On your Ledger Nano S device, navigate to the Galxe app and confirm the connection by pressing the right button.
Once the connection is confirmed, your Ledger Nano S is now successfully connected to Galxe. You can now securely manage and store your cryptocurrencies using your hardware wallet!
What is Galxe?
Galxe is a decentralized finance platform that allows users to connect their wallets and manage their digital assets.