How to Add APTOS/SOLANA/SEI/INJECTIVE/FLOW/STARKNET Wallet to Your Galxe ID: Step-by-Step Guide
If you’re a crypto enthusiast who wants to explore the exciting world of APTOS, SOLANA, SEI, INJECTIVE, FLOW, and STARKNET, you’ll need a secure and convenient wallet to store and manage your digital assets. Galxe ID is the perfect solution for adding these wallets to your crypto toolbox. In this step-by-step guide, we’ll walk you through the process of adding APTOS, SOLANA, SEI, INJECTIVE, FLOW, and STARKNET wallets to your Galxe ID account.
Galxe ID is a user-friendly platform that enables you to manage multiple wallets in one place. With Galxe ID, you can easily add, track, and transact with your favorite cryptocurrencies. Whether you’re a seasoned crypto investor or just starting out, Galxe ID simplifies the wallet management process and provides a seamless user experience.
Adding APTOS, SOLANA, SEI, INJECTIVE, FLOW, and STARKNET wallets to your Galxe ID account is quick and straightforward. First, you’ll need to download and install the Galxe ID app from your preferred app store. Once installed, open the app and create a new account or log in to your existing Galxe ID account.
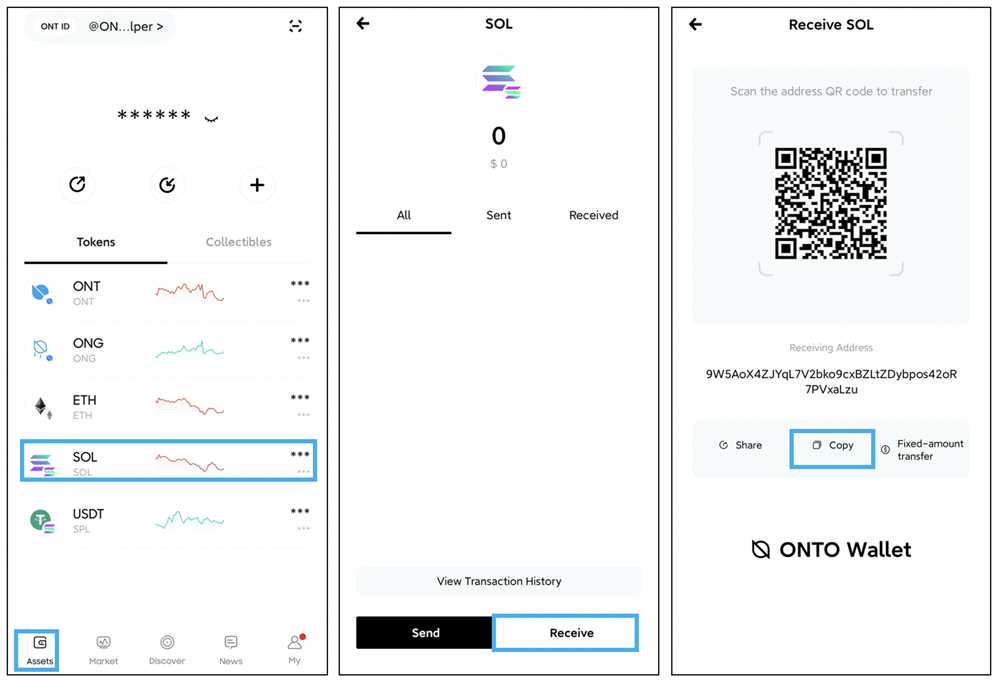
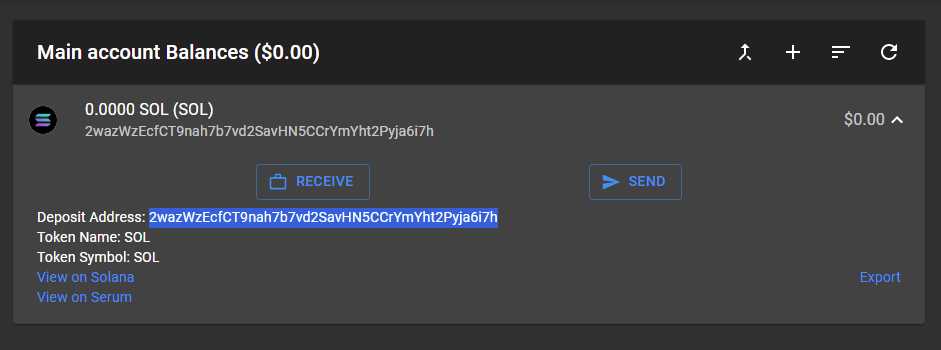
After logging in, navigate to the wallet section and click on the “Add Wallet” button. Select the desired cryptocurrency from the available options – APTOS, SOLANA, SEI, INJECTIVE, FLOW, or STARKNET. Follow the on-screen instructions to generate a new wallet for the selected cryptocurrency. Galxe ID will provide you with a unique wallet address and a recovery phrase to securely access and restore your wallet.
Once you’ve added your APTOS, SOLANA, SEI, INJECTIVE, FLOW, or STARKNET wallet to Galxe ID, you can start enjoying the benefits of wallet management in one place. With Galxe ID, you can easily send, receive, and track your transactions across multiple cryptocurrencies. Plus, Galxe ID offers enhanced security features such as biometric authentication and two-factor authentication, ensuring that your digital assets are safe and secure.
In conclusion, Galxe ID makes it easy to add APTOS, SOLANA, SEI, INJECTIVE, FLOW, and STARKNET wallets to your crypto arsenal. With its user-friendly interface and advanced security features, Galxe ID is the perfect platform for managing and transacting with multiple cryptocurrencies. Take control of your digital assets and streamline your wallet management process with Galxe ID today!
How to Add Galxe ID: Step-by-Step Guide
If you want to start using Galxe ID, you’ll need to follow these step-by-step instructions to add it to your wallet:
Step 1: Install the Galxe ID Extension

To begin, you’ll need to install the Galxe ID extension to your browser. The Galxe ID extension is compatible with major browsers such as Chrome, Firefox, and Brave. Visit the extension store for your browser and search for “Galxe ID”. Click on the appropriate result and follow the instructions to install it.
Step 2: Create or Import a Wallet

Once the extension is installed, open it and choose the option to create a new wallet or import an existing one. If you are creating a new wallet, be sure to follow the strong password recommendations and keep your seed phrase in a safe place. If you are importing an existing wallet, you’ll need to enter the seed phrase or the private key associated with that wallet.
Step 3: Connect to Galxe ID

After successfully setting up your wallet, you’ll need to connect it to Galxe ID. On the Galxe ID extension, click on the “Connect Wallet” button. You’ll be presented with a list of supported blockchain networks such as APTOS, SOLANA, SEI, INJECTIVE, FLOW, and STARKNET. Choose the network you want to connect to and click on it.
Once you’ve selected the desired network, you’ll be prompted to sign a message to verify that you are the owner of the wallet. Follow the instructions on the Galxe ID extension to sign the message using your wallet credentials.
Step 4: Start Using Galxe ID

Now that your wallet is connected to Galxe ID, you can start using it to interact with decentralized applications on the supported blockchain network. Galxe ID provides a seamless and secure way to authenticate your identity and perform transactions on these networks.
Remember to always keep your wallet credentials secure and be cautious when interacting with decentralized applications. Make sure to double-check the integrity of the applications you are using and exercise caution when entering sensitive information.
Conclusion
By following these steps, you should now have successfully added Galxe ID to your wallet. Enjoy the convenience and security that Galxe ID provides in the world of decentralized applications.
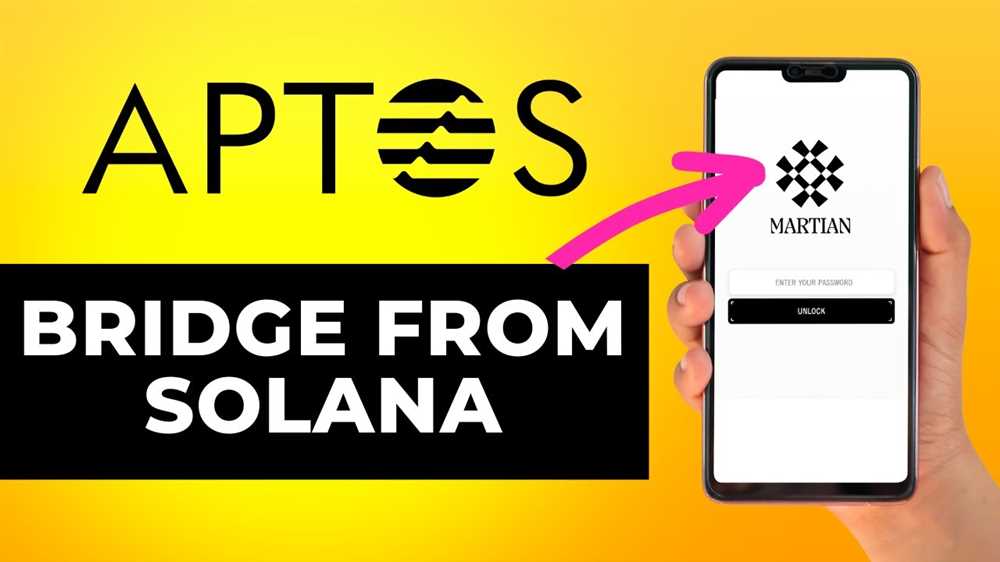
Install APTOS/SOLANA/SEI/INJECTIVE/FLOW/STARKNET Wallet
Adding a wallet to your Galxe ID account is a straightforward process. Here’s how you can install the APTOS/SOLANA/SEI/INJECTIVE/FLOW/STARKNET wallet:
| Step 1: | Access the Galxe ID website and log in to your account. |
| Step 2: | Navigate to the “Wallet” section in your account settings. |
| Step 3: | Click on the “Install Wallet” button. |
| Step 4: | Choose the APTOS/SOLANA/SEI/INJECTIVE/FLOW/STARKNET wallet from the available options. |
| Step 5: | Follow the on-screen instructions provided by the wallet developer to complete the installation process. |
Once the installation is finished, you will have successfully added the APTOS/SOLANA/SEI/INJECTIVE/FLOW/STARKNET wallet to your Galxe ID account. You can now use this wallet to manage your digital assets within the Galxe ecosystem.
Create Galxe ID

Creating a Galxe ID is a simple process that allows you to securely manage your APTOS/SOLANA/SEI/INJECTIVE/FLOW/STARKNET wallets. Follow the step-by-step guide below to get started:
Step 1: Visit the Galxe website and click on the “Sign Up” button.
Step 2: Fill in the required information, including your email address, password, and any additional details requested.
Step 3: Verify your email address by clicking on the verification link sent to your email.
Step 4: Create a strong and unique password for your Galxe ID. Make sure to include a combination of uppercase and lowercase letters, numbers, and special characters.
Step 5: Set up two-factor authentication (2FA) for added security. This can be done through the Galxe settings once you have logged in.
Step 6: Once your Galxe ID is created, you can now add your APTOS/SOLANA/SEI/INJECTIVE/FLOW/STARKNET wallets. Click on the “Add Wallet” button and follow the prompts to connect your desired wallet.
Step 7: After successfully connecting your wallet, you will be able to manage your cryptocurrencies and access various features and services provided by Galxe.
It is important to remember to keep your Galxe ID login details secure and not share them with anyone. Additionally, regularly update your password and enable any recommended security features to ensure the safety of your funds.
By following these steps, you can create a Galxe ID and start safely managing your APTOS/SOLANA/SEI/INJECTIVE/FLOW/STARKNET wallets with ease and convenience.
Connect Galxe ID to Wallet
To connect your Galxe ID to your wallet, follow these steps:
- Open your wallet app or extension.
- Locate the settings or options menu.
- Find the “Connect Galxe ID” option.
- Click on “Connect Galxe ID” and a QR code will appear.
- Open the Galxe ID app on your mobile device.
- Tap on the “Scan QR Code” option.
- Scan the QR code displayed on your wallet screen.
- Once the QR code is scanned, your wallet will be connected to Galxe ID.
- You can now use your Galxe ID to securely sign transactions and access various decentralized applications.
By connecting your Galxe ID to your wallet, you can enjoy the convenience and security of using your identity to interact with the Galxe ecosystem and other supported blockchains.
What is Galxe ID?
Galxe ID is a decentralized identity system that allows users to create and manage their digital identities on multiple blockchain networks.
Why would I need to add APTOS/SOLANA/SEI/INJECTIVE/FLOW/STARKNET wallet?
Adding a wallet for these blockchain networks would allow you to store, send, and receive tokens specific to these networks. It also enables you to interact with decentralized applications and participate in various blockchain activities on these networks.
Can I use the same Galxe ID for multiple blockchain networks?
Yes, Galxe ID is designed to be interoperable across multiple blockchain networks. You can use the same Galxe ID to access and manage your digital identity on APTOS/SOLANA/SEI/INJECTIVE/FLOW/STARKNET and other supported networks.
How do I add a wallet for APTOS/SOLANA/SEI/INJECTIVE/FLOW/STARKNET on Galxe ID?
To add a wallet for these networks on Galxe ID, you need to go to the wallet section of the Galxe ID platform and select the specific network you want to add a wallet for. Follow the step-by-step guide provided on the platform to create and link your wallet to your Galxe ID.
What are the benefits of using Galxe ID for managing my digital identity?
Using Galxe ID provides several benefits, including decentralized identity management, interoperability across multiple blockchains, enhanced security through cryptographic methods, and easier access to decentralized applications and blockchain services. It also enables you to maintain full control over your personal data and simplifies the process of managing your digital identity across various platforms.