How to Set Up and Connect Your Galxe Account: A Detailed Guide
Welcome to Galxe, the premier platform for connecting with friends, family, and colleagues! In this step-by-step guide, we will walk you through the process of setting up and linking your account on Galxe. Whether you’re a new user or looking to update your existing account, we have you covered.
First, let’s start with the basics. To create a new account on Galxe, simply click on the “Sign Up” button on the homepage. Fill out the required fields, including your name, email address, and password. Make sure to choose a strong password to keep your account secure. Once you’ve entered all the necessary information, click “Sign Up” to proceed.
If you already have an existing account on Galxe, you can easily link it to your current email address. Simply log in to your account and navigate to the “Settings” section. From there, select the “Linked Accounts” tab and click on “Link Email”. Enter the email address you want to link to your account and click “Link”. You will receive a verification email to confirm the link. Follow the instructions in the email to complete the process.
Once you’ve set up or linked your account, you can start exploring all that Galxe has to offer. Connect with friends and loved ones, join communities and groups based on your interests, and enjoy a seamless social networking experience. Make sure to update your profile with a catchy bio, profile picture, and cover photo to make a lasting impression.
So what are you waiting for? Follow this step-by-step guide to set up and link your account on Galxe today and embark on a journey of seamless connection and engagement!
Creating a Galxe Account

To start using Galxe, you will need to create an account. Follow the steps below to set up your account:
Step 1: Go to the Galxe website
Open a web browser and navigate to the Galxe website at www.galxe.com.
Step 2: Click on the “Sign Up” button
On the homepage, locate and click on the “Sign Up” button to begin the account creation process.
Step 3: Provide your personal information
Fill out the required fields, including your full name, email address, and desired password. Make sure to use a strong password to protect your account.
Step 4: Agree to the terms and conditions
Read through the terms and conditions of Galxe and check the box to indicate that you agree to them.
Step 5: Verify your email address
After completing the registration form, Galxe will send a verification email to the provided email address. Open the email and click on the verification link to confirm your account.
Step 6: Set up your profile

Once your email is verified, you will be prompted to set up your profile. Add a profile picture, provide some basic information about yourself, and customize your profile settings as desired.
Step 7: Start exploring Galxe
With your account created and profile set up, you are now ready to start using Galxe. Begin by exploring the various features and functionalities available on the platform.
| Note: | Ensure you keep your Galxe login credentials confidential and avoid sharing them with anyone to protect your account from unauthorized access. |
Verifying Your Galxe Account
Before you can fully access all the features and capabilities of your Galxe account, you will need to verify your account. Verifying your Galxe account serves as an important security measure and helps ensure that only authorized individuals have access to your account.
To verify your Galxe account, simply follow these steps:
Step 1: Check your email
Once you have created your Galxe account, you should receive an email from Galxe with a verification link. Check your email inbox, including spam or junk folders, for this email. Make sure to add noreply@galxe.com to your safe senders list to prevent future emails from Galxe from being marked as spam.
Step 2: Click the verification link

Open the email from Galxe and click on the verification link provided. This will redirect you to a verification page on the Galxe website.
Alternatively, you can also copy and paste the verification link into your web browser’s address bar if clicking on the link does not work.
Step 3: Complete the verification process

Once you are on the Galxe verification page, follow the instructions provided to complete the verification process. This may involve entering a verification code sent to your email or confirming your account details.
After successfully completing the verification process, you will have full access to your Galxe account and can start exploring all the features and functionalities it has to offer.
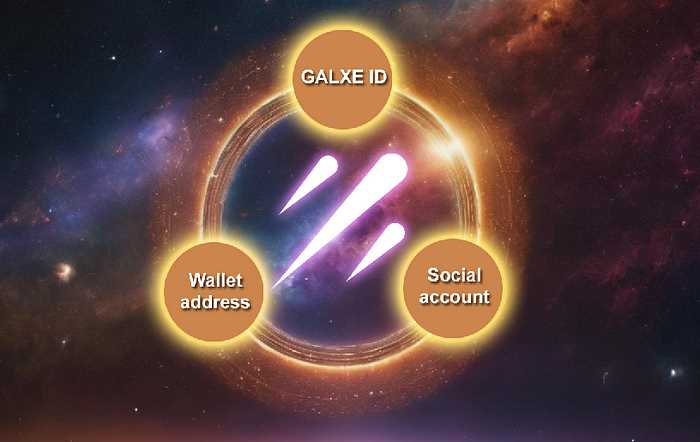
Linking Your Galxe Account

Once you have set up your Galxe account, the next step is to link it to your other accounts for a seamless experience. Here’s how you can do it:
1. Log in to your Galxe account using your username and password. Once you are logged in, navigate to the account settings page.
2. Look for the section called “Linked Accounts” or something similar. In this section, you will find options to link your various accounts such as social media platforms or email accounts. Click on the “Add Account” button or a similar option to start linking.
3. Select the type of account you want to link. Galxe usually supports popular platforms like Facebook, Twitter, Instagram, and Gmail. Choose the platform you want to link and click on it.
4. You will be redirected to the login page of the platform you selected. Enter your credentials (username and password) and click on the login button to proceed.
5. After successfully logging in, you will be asked to grant Galxe permission to access your linked account. Read the terms and conditions, if any, and click on the “Allow” or “Grant Access” button to continue.
| Troubleshooting: |
|---|
| If you encounter any issues while linking your account, here are some troubleshooting tips: |
| – Double-check your login credentials for the account you are trying to link. |
| – Make sure you have an active internet connection. |
| – Clear your browser’s cache and cookies, then try again. |
| – Contact Galxe support for further assistance. |
6. Once you have granted permission, you will be redirected back to the Galxe website or app. Your account should now be successfully linked. You may see the linked account’s logo or name on your account settings page as confirmation.
7. Repeat the process for any other accounts you want to link to your Galxe account.
By linking your accounts, you can easily share your Galxe activity on other platforms, import contacts, or sync your data. It also eliminates the need to remember multiple login credentials for different services.
Note: Be cautious while granting access to your accounts and make sure the platform you are linking to is trustworthy.
Finalizing Your Galxe Account Setup

After completing the initial setup of your Galxe account, there are a few final steps to take to ensure everything is connected and ready to go.
1. Verify your email address: Check your inbox for a verification email from Galxe and click on the provided link to confirm your email address. This step is important to ensure the security of your account.
2. Connect your social media accounts: If you want to link your Galxe account to your existing social media profiles, navigate to the settings menu and follow the instructions to connect your accounts. This will allow you to easily share your Galxe posts on other platforms and connect with friends who are also on Galxe.
3. Customize your account settings: Take some time to go through the account settings and customize them to your preferences. You can choose your privacy settings, notification preferences, and profile information. It’s important to review and set these options according to your needs.
4. Add a profile picture and bio: Personalize your Galxe profile by uploading a profile picture and writing a brief bio. Adding these details will make your account more engaging and help others identify you on Galxe.
5. Explore Galxe features: Now that your account is all set up, take some time to explore the different features and sections of Galxe. You can browse through trending posts, join communities, follow other users, and start engaging with content that interests you.
By following these final steps, you’ll be ready to fully enjoy Galxe and make the most out of your account. Happy Galxe-ing!
What is Galxe?
Galxe is a popular online platform that allows users to share and discover creative content, such as artwork, photography, and writing.
How do I set up an account on Galxe?
Setting up an account on Galxe is simple. Just go to the Galxe website and click on the “Sign Up” button. Then, follow the instructions to enter your information and create a username and password.
Can I link my social media accounts to my Galxe account?
Yes, you can link your social media accounts to your Galxe account. This can be done by going to your account settings and selecting the option to link your social media profiles. You will then need to authorize Galxe to access your social media accounts.
What are the benefits of linking my social media accounts to my Galxe account?
Linking your social media accounts to your Galxe account can have several benefits. It allows you to easily share your Galxe content on your social media platforms, which can increase your visibility and reach. It also allows you to connect with other Galxe users who may have similar interests or followings on social media.
Is it possible to unlink my social media accounts from my Galxe account?
Yes, you can unlink your social media accounts from your Galxe account at any time. Simply go to your account settings, find the option to manage your linked accounts, and follow the instructions to disconnect them.